Anyway.....check it all out....
With some inspiration from http://www.ikeahackers.net/ I solved a problem. I have several cats. At the time I converted this shelving unit I had five cats. One of them gets a UTI if he even looks at dry food, so I needed to keep him separated to feed. The condo has come in very handy as a "hospital ward" a number of times. Valentino is no longer the only kitty needing special food. Sasha will mostly only eat dry chow, the boys can't have it, so she gets hers up on a shelf in her daddy's (my hubby...yeah, the one who's not a cat person, lol) closet. ETA: that was the single worst paragraph in the history of blogging; here's the original post as I drafted it in 2010:
There's a blog out there called Ikeahacker. It has all these projects folks have created by turning an IKEA item into something else. Some people don't quite get it, and post a table they've painted a different color, but all in all there are some pretty nifty ideas. This particular project was born when Valentino had to have a special diet and I was trying to figure out a way to keep him separate without tying up a room and having to put a catbox in said room. Browsing through the pet hack ideas I started to get an idea for the Gorm shelving unit I had in my studio. It wasn't working out for what I had originally planned...so I started doodling at work.
I wanted something I could lock Valentino in (or any one of the cats) and have him be comfortable. A place to sleep, a litter box, food, and water were the prime elements...and letting sunshine in as well.
I missed taking some pics, and one or two of these are kind of blurry...at some point I need to drag it out of its corner and retake some. Without further ado...I give you the making of Valentino's Kitty Kondo.
This cat...Valentino, the silly one with the bungle bee on his head...who's not fat anymore, either!
The Gorm unit runs $40 and is made from impossibly cheap wood, but it's surprisingly sturdy, once you get it put together. In addition to the "Gorm," I used 1x2s, large casters, sheet rock screws, screen, 5/8" screen door molding, corner brackets, 1" brads, Gorilla Glue, a kitty house/scratching post/platform thingy, the plastic pieces from one of these,
hinges, and screen door hooks.In retrospect, I think I'd use hardware cloth instead of the screen. it would be harder to pull lose and the kitty can't shred it with claws of raptorness. There was a lot of trial and error in this...although you can't really afford to make an oops when cutting your pass-throughs from one floor to the next, so think about those carefully.
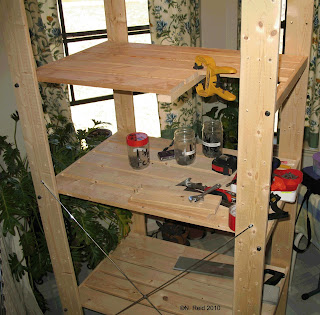
Cutting the passthroughs from one floor to the next. Save the pieces of board.
Used 1x2 with glue and screws.
Gorilla Glue!
Dismantle kitty play tower. (ew...and dust the sewing cabinet!)
I needed another set of steps from the bottom floor to the second floor, so I took one of these step units--one of my son's not-too-bright teenage friends had tried to stand on it, so it was cracked anyway--removed the cover and cut it apart to make a new set of steps.
Here are the steps--I'm refitting the condo (see lessons learned), so they're a tad dirty.
Very blurry pictures of Valentino in the finished cat condo. the hideous couch in the background is a future project. I don't seem to have pics of framing and attaching the screen and making the doors. Rats. I put screen molding on the edges of the screen, and 1x2 along the tops and bottoms. I built two door frames from 1x2s and then used the molding to hold on the screen.
Another really blurry pic of the finished doors. I used a triangular kitty box, designed for corners, in the bottom. I can take the box in and out through the lower door.
Lessons learned: either put the doors on the long side, or a set on both ends; would facilitate cleaning a whole lot! Use hardware cloth instead of screen!! Easier to clean and when the cat barfs in your condo, the Dumb-Ass Dog© won't shred the screen trying to get at it (ew); that's why I'm refitting the whole thing.
Dumb-Ass Dog©


No comments:
Post a Comment